

A Guide to Your First Photography Exhibition
- Definition of Theme or Concept: Clearly define the theme or concept of your exhibition. What is the main idea you want to convey through your photographs? Is there a recurring theme that ties all the images together?
- Selecting Photographs: Carefully choose the images that best represent your theme and demonstrate the highest technical and artistic quality.
- Choosing Paper and Finish: The choice of paper is essential. The texture (smooth or textured) and finish (gloss, matte, luster, pearl, baryta, or satin) can influence how the details and colors in the image are perceived. Each type of paper can add a different narrative dimension to your photographs.
Ink Types: Choosing the right ink is essential to ensuring that colors and black tones are reproduced accurately and true to the original intent. Researching and testing different types of ink can help you achieve the perfect reproduction of your images.
- Presentation Format: Decide on the format in which you will present your work—whether framed, mounted on foam board, or printed on canvas. Consider the size and whether you will include a description or text alongside each photo.
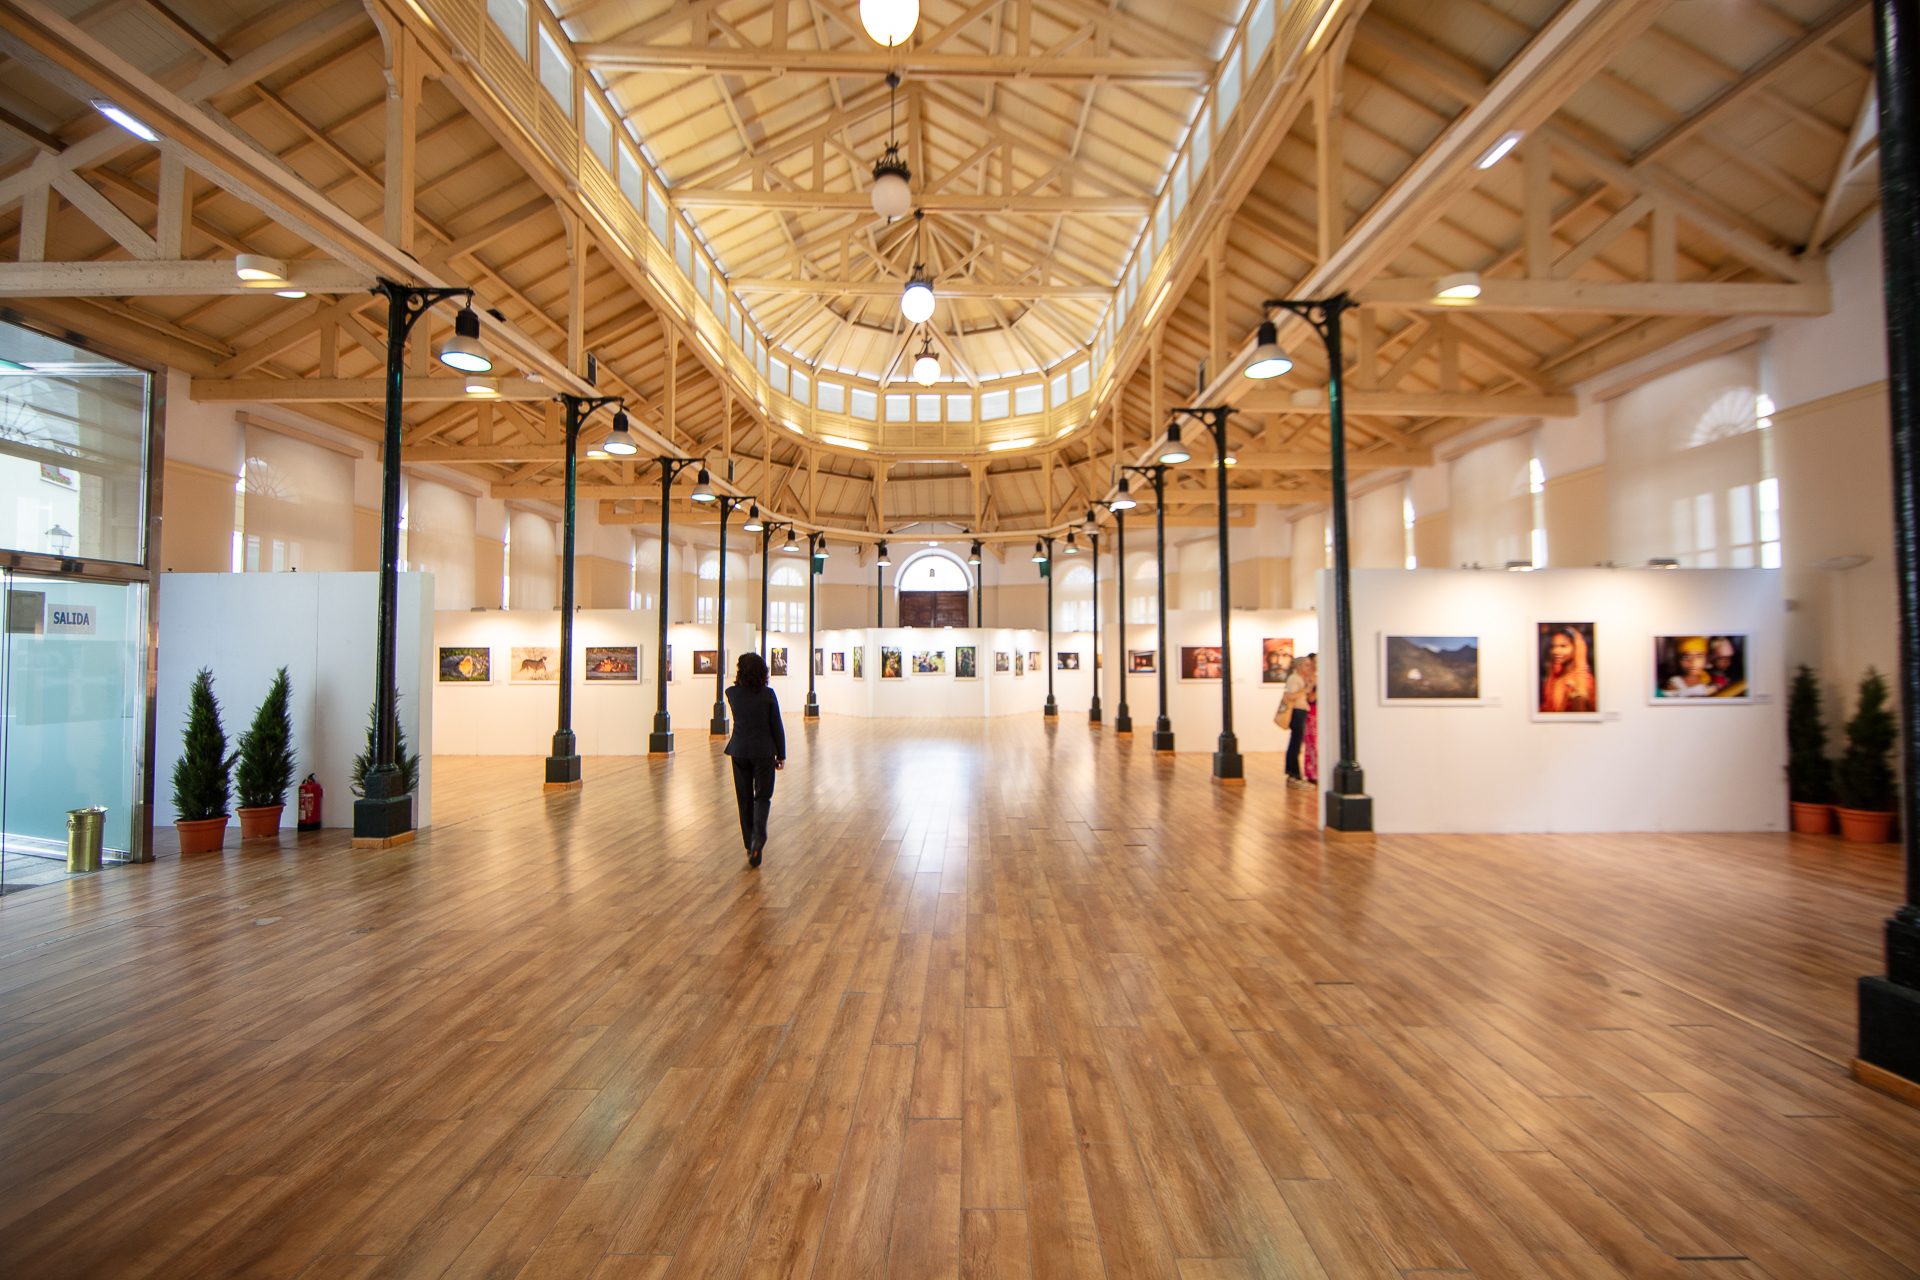
- Exhibition Space: Find a suitable venue to display your work, such as an art gallery, a café, or a library. Consider factors such as size, lighting, and accessibility.
- Budget: Determine a budget that covers all expenses, from printing and framing the photographs to promoting the exhibition.
- Promotion: Once everything is ready, promote your exhibition through social media, local media, invitations, and events.
- Opening: Organize an opening event to formally present your work to friends, family, colleagues, and industry professionals.
- Selling Photographs: If you decide to sell your work, set appropriate prices and consider offering different formats or sizes.
- Guest Book: Provides a space where attendees can share their thoughts and contact information.
- Documentation: Document the entire process—from installation to audience interaction with your works—for future reference and promotional purposes.
- Dismantling: Plan how and when you will take down the exhibition, ensuring that your photographs remain intact.
- Acknowledgments: Please acknowledge and thank everyone who supported you in the process of creating and setting up the exhibition.
Definition of Topic or Concept:
The theme or concept of your photo exhibition is the cornerstone upon which the entire show is built. It is the central idea you want to convey to your viewers and the common thread that ties each of your photographs together. Here are some things to keep in mind:
- Authenticity: Choose a subject you're passionate about and feel connected to. Your sincerity and commitment to the subject will shine through in your work and resonate with your audience.
- Research: Once you’ve chosen a topic, do some research on it. This will give you a deeper understanding and allow you to approach it from different angles. For example, if you choose “urban landscapes,” research the city’s history, architectural changes over the years, and the stories of its residents.
- Coherence: Make sure all the photographs selected for the exhibition relate to the chosen theme. It doesn't have to be a direct connection, but there should be a common thread linking them.
- Narrative: Think about how you want the audience to experience your exhibition. Is there a story you want to tell? If so, arrange your photographs in a way that guides the viewer through that narrative.
- Originality: Although many subjects have been explored time and again in photography, there is always room for a new and fresh approach. Think about how you can approach your subject from a unique perspective.
- Relevance: While not mandatory, consider how relevant your topic is in today’s context. A topic that resonates with current events or situations can attract a wider audience and spark meaningful discussions.
In short, defining your topic or concept is a crucial decision that will lay the groundwork for the success of your presentation. It’s an opportunity to share your worldview, your passions, and your reflections with others, so take the time to choose it carefully and develop it thoughtfully.
- Selection of Photographs:
Selecting photographs for your exhibition is a crucial process that will determine how your work is perceived. It’s an opportunity to showcase your technical and artistic skills and to convey your vision to the public. Here are some key points to consider:
- Technical Quality: Make sure the photos you select are of high quality in terms of focus, exposure, composition, and post-processing. Any technical flaws can distract the viewer from the message or emotion you’re trying to convey.
- Thematic Relevance: All selected images must align with the theme or concept of your exhibition. While it may be tempting to include a spectacular photo that isn’t directly related to the theme, this can confuse or disorient the audience.
- Diversity and Variety: While it is essential to stay true to the theme, it is also beneficial to showcase different facets or perspectives of it. This can help keep the viewer engaged and provide a deeper understanding of the concept you are presenting.
- Flow and Sequence: Consider the order in which the photographs will be displayed. Is there a narrative or logical progression you want to follow? The way you organize the images can influence the viewer’s experience and how they interpret your work.
- Emotional Impact: Think about the emotions you want to evoke in your audience. Some photographs can be powerful and thought-provoking, while others can be subtle and contemplative. Striking the right balance can create an enriching experience for the viewer.
- Space Constraints: Consider the space where the exhibition will take place. How many photographs can you comfortably display without making the space feel crowded? Sometimes less is more, and selecting only your best work can have a more significant impact.
- Feedback and Opinions: Before making a final decision, it can be helpful to seek the opinions of colleagues, mentors, or friends. Often, an outside perspective can offer valuable insights or highlight aspects you may not have considered.
In short, selecting photographs is a process that requires careful thought and attention. Each image should be a true representation of your vision and skills, and together, they should tell a cohesive and captivating story. It is essential to be critical and selective to ensure that your exhibition has the desired impact.
- Choosing Paper and Finish:
Choosing the right paper and finish for your photo prints can be just as important as your shooting technique or post-processing. Below is a detailed guide on how to approach selecting the paper and finish for your prints:
Understanding the Role
- Weight: The paper weight, measured in grams per square meter (g/m²), indicates the paper's thickness and stiffness. Heavier paper is generally more durable and sturdy, but it can also be more expensive.
- Ink absorption: Some papers absorb more ink than others. This can affect the sharpness and saturation of the image. It is important to choose paper that is specifically designed for photo printing.
Paper Textures
- Smooth: Ideal for photographs with fine details, such as portraits. It provides a uniform surface that allows for a clear reproduction of the image.
- Textured: This can add a tactile quality to the photo, making it appear more three-dimensional. It’s excellent for artistic works or photos that aim for a more traditional look.
Types of Finish
- Brightness: It enhances contrast and color vibrancy, but it can cause glare, which might make it difficult to see the screen from certain angles.
- Matte: Reduces glare and is ideal for images with soft tones. However, it may not be the best choice for photos with vibrant colors.
- Satin: A combination of gloss and matte, providing a balance in terms of color and sheen.
- Pearlescent: It has a shimmering finish with a metallic effect, ideal for vibrant, modern images.
- Baryta: Mimics the look of traditional darkroom prints. Ideal for black-and-white photographs.
- Satin: Provides a smooth finish with a subtle sheen, preserving details while preventing excessive glare.
Narrative Considerations:
- The paper and finish can add a narrative dimension to your images. For example, an old or historical photo might benefit from a baryta finish to evoke a sense of nostalgia, while a photo of an urban nightscape could look spectacular on a pearlescent finish.
- Testing: If possible, print test samples on different types of paper and with different finishes. See how the image looks on each and decide which one best matches your vision.
- Consult with Professionals: If you're unsure, consult with professionals at photo labs. Their expertise can provide valuable insights into which paper and finish would be best for your photos.
Choosing the right paper and finish not only enhances the beauty and professionalism of your images, but also conveys your artistic vision and narrative. It is a powerful tool in the photographer’s hands for conveying feelings, emotions, and stories through photography.
Ink Types
The choice of ink in photographic and fine art printing is essential to ensuring an accurate and long-lasting reproduction of images. Below, we detail the importance of water-based pigment inks and provide a brief overview of other available options:
Water-Based Pigment Inks
- Water-based pigment inks lead the market in terms of color and tone reproduction. They offer a wide and rich color range, capturing nuances and gradations that other inks cannot achieve.
- They are known for their resistance to fading and durability, making them ideal for archival prints and gallery exhibitions.
- They stand out for their ability to produce deep blacks, enhancing contrast and image clarity.
Dye-Based Inks
- These inks are water-soluble and produce bright, vibrant colors. However, their resistance to fading may be lower compared to pigment-based inks.
Solvent-based inks:
- They are ideal for outdoor use because they are water- and UV-resistant. Although they offer vibrant colors, they may not reproduce subtle shades as accurately.
UV inks:
- These inks cure under ultraviolet light and are fade-resistant. They are ideal for outdoor signage and advertising, but may not be the best choice for high-quality art reproduction.
Latex Inks
- They are eco-friendly and offer good resistance to water and fading. They are mainly used in large-format applications.
While water-based pigment inks are the undisputed choice for professional photographic and fine art printing due to their precision and longevity, it is essential to recognize the applications and advantages of the other inks available on the market. Each type has its own benefits and limitations, so it is crucial to research and test them based on the specific needs of the project.
In short, choosing the right ink is a critical aspect of photographic and fine art printing. Water-based pigment inks excel in terms of quality and durability, but it is essential to consider all options based on the specific requirements and specifications of the project at hand.
- Presentation Format
Presenting your photos in the right way can enhance their impact and convey professionalism. Here are some key points to consider:
Framed
- Frame Material: Options range from wood, metal, and plastic to eco-friendly materials. Your choice should complement the style of your photos.
- Color and Style: Dark frames can provide a striking contrast to bright photos, while light frames can soften more intense images.
- Glass or Acrylic: Ideal for protecting the photo from dust and external factors. Anti-glare glass is an option for minimizing reflections.
Mounting on a rigid surface
- Foam Mounting: Offers a clean, contemporary look. Its lightweight nature makes it ideal for temporary exhibitions.
- Mounting on Aluminum Dibond: A durable and elegant option that gives photos a modern, smooth finish. Aluminum Dibond consists of two aluminum sheets with a polyethylene core, providing both stability and lightness. It is resistant to warping and perfect for large-format photographs.
Canvas Print
- Canvas adds an artistic, textured touch to photographs. It is particularly effective for portraits and landscapes.
Other considerations
- Print Size: You should adjust the size to fit the available space and achieve the desired effect. Both a single large image and several small ones can make a significant impact.
- Descriptions or Captions: Adding descriptive captions can provide context for each photo. The text should be consistent with the style of the exhibition.
- Interactivity: Consider digital elements, such as QR codes, that can enhance the visitor experience with multimedia content.
- Order and Layout: The arrangement of the photos can guide a visual narrative. Plan how you want the audience to experience your work.
- Protection: If your artwork is particularly valuable or delicate, consider lamination or UV coating.
- Additional Copies: If you plan to sell your work, having copies in different sizes or formats can be advantageous.
The presentation format is an expression of your creativity and vision as a photographer. Make sure that every choice reinforces the essence of your work and helps you connect with your audience.
- Exhibition Space
The space where you choose to exhibit your work is crucial to how the public perceives and experiences it. Here are some additional considerations for choosing and preparing the exhibition space:
- Location: The location of the space is crucial. A central or well-known location can attract more visitors. However, a more secluded space with a special atmosphere can also offer a unique experience.
- Acoustics and Ambience: If you plan to have music or any kind of audio presentation, the venue’s acoustics are essential. In addition, temperature and ventilation are factors that can affect visitors’ comfort.
- Lighting: Lighting can make or break a photo shoot. Make sure the space allows you to adjust the lighting to suit your needs, whether using natural or artificial light.
- Walls and Installation: Consider the color and texture of the walls. A neutral color like white or light gray is usually ideal for showcasing photographs. Also, check whether the space allows for nailing or gluing to the walls, or if you’ll need additional mounting hardware to hang your artwork.
- Security: If your photographs have significant value—whether emotional or monetary—consider the security of the location. This may include security cameras, security personnel, or alarm systems.
- Accessibility: Make sure the space is accessible to everyone, including people with disabilities. This may involve ramps, elevators, or proper signage.
- Additional Amenities: Depending on the length of your exhibition, you may need amenities such as restrooms, a lounge area, or even a small café or bar.
- Contract and Agreement: Before confirming the space, read any contract or agreement carefully. Make sure you understand the obligations, rights, and responsibilities of both parties.
- Preliminary Visit: If possible, visit the space several times at different times of the day. This will give you an idea of the natural lighting and foot traffic in the area.
- Feedback: Before the exhibition, consider inviting a small group of friends or colleagues to get their feedback on the installation and presentation in the chosen venue.
By giving the exhibition space the attention it deserves, you not only ensure that your work is presented in the best possible light, but you also provide a memorable experience for your visitors.
- Budget:
A budget is an essential tool for ensuring that your photo exhibition is not only an artistic success but also a financial one.
- Initial Estimate: Before you start spending any money, it’s important to have a general idea of how much you’re willing to invest in your exhibition. This amount should be realistic and based on your savings, expected income, or potential sponsors.
- Fixed Costs: These are the costs you will have to pay regardless of how many people attend your exhibition.
- Photo Printing: Research different providers and print quality options. Remember that high-quality printing can make a big difference in how your work is perceived.
- Framing: Depending on the display format you choose, framing can be a significant expense. Look for options that protect your photos while also complementing your work.
- Rental Fees: While some venues may offer you their space for free or in exchange for a percentage of sales, others may require a rental fee.
- Variable Costs: These costs depend on the number of attendees or other factors.
- Advertising: If you decide to invest in paid advertising, such as ads on social media or in local media, this would be a variable cost.
- Catering for the Opening Event: If you decide to serve refreshments or drinks during the opening, be sure to factor this expense into your budget.
- Expected Income: If you plan to sell your photographs, estimate how much you expect to earn. This will help you set your prices and determine whether you’ll cover your costs and make a profit.
- Contingency Fund: It’s always a good idea to set aside a small amount of money for unexpected expenses or emergencies. This could be an additional 10% of your total estimated budget.
- Recording and Tracking: As you plan your exhibition, keep a detailed record of all your expenses. This will help you stay within your budget and make adjustments if necessary.
With a well-planned and closely monitored budget, you'll reduce financial stress and be able to focus on what matters most: presenting your work in the best possible way.
8. Promotion:
Promotion is essential to ensuring that your photo exhibition attracts as many visitors as possible and receives the recognition it deserves. Here is a more detailed breakdown of this point:
- Identifying Your Target Audience: Before launching any promotional strategy, it is crucial to identify who your exhibition is aimed at. Is it intended for the general public, photography enthusiasts, industry professionals, or art collectors? Understanding your audience will allow you to tailor your messages and communication channels.
Social Media:
- Regular Posts: Share updates, behind-the-scenes photos, the setup process, and other aspects related to the exhibition. This builds anticipation and fosters a connection with your audience.
- Paid Ads: Platforms like Facebook and Instagram offer targeted advertising options that can help you reach a wider and more specific audience.
- Stories and Live Streams: Use these formats to interact with your followers in real time, offer virtual tours, or host Q&A sessions about your work.
Local Media:
- Press Releases: Write a clear and concise press release about your exhibition and send it to local media outlets: newspapers, radio stations, and television stations.
- Interviews: If you have the opportunity, take part in interviews to discuss your exhibition and your work in general.
- Partnerships: Consider partnering with influencers, bloggers, or content creators involved in the local art or culture scene. They can help you promote your exhibition in exchange for exclusive access or special content.
- Invitations: Send physical or digital invitations to key contacts, such as art critics, industry professionals, friends, and family. Make sure the information is clear and appealing.
- Related Events: Organize talks, workshops, or discussions related to your exhibition. This can attract a diverse audience and generate more interest in your work.
- Signage and Posters: Make sure you have adequate signage at the exhibition venue and consider placing posters in strategic locations around the city.
Feedback and Adaptation: Monitor the effectiveness of your promotional strategies and don’t hesitate to adjust them based on audience responses and feedback.
Remember that promotion isn't just about attracting as many people as possible, but about attracting the right audience and creating a memorable experience around your work. Anticipation and planning are key to a successful promotion.
9. Opening:
The opening is the event that marks the official start of your photography exhibition. It’s an opportunity to showcase your work, interact with the public, and network with professionals and enthusiasts in the field. Here’s a more detailed breakdown of this point:
- Date and Time: Choose a date and time that works for most of your guests. Try to avoid holidays or dates when other major events are taking place in your city. Openings are usually held in the afternoon or evening to allow people to attend after work.
- Special Invitations: In addition to general invitations, consider sending personalized invitations to key individuals, such as art critics, curators, collectors, and other professionals in the field.
- Welcome Protocol: Designate a specific area for greeting guests. It may be helpful to have someone at the entrance to welcome guests, hand out a program or exhibition brochure, and direct attendees.
- Opening Remarks: Be prepared to give a brief speech about your work, the concept behind the exhibition, and to thank those who have supported you. This not only sets a formal and professional tone, but also provides context for the audience.
- Catering: Depending on your budget, you can offer appetizers, drinks, or even a full catering service. Be sure to offer options for different dietary preferences and consider including non-alcoholic options.
- Music: Music can set the right mood for your opening. Choose instrumental or soft music that won’t distract from the visual experience. If your budget allows, you might consider hiring a live musician or small ensemble.
- Interaction: Take the time to interact with your guests. Answer questions about your work, gather feedback, and build connections. Remember that the opening isn’t just about your work—it’s also about building relationships.
- Documentation: Make sure to have someone document the event, whether through photos or video. This documentation is valuable for your portfolio and future promotional efforts.
- Acknowledgments: At the end of the opening, take a moment to thank the attendees for coming and those who helped you organize the event.
- Reminders: Before your guests leave, remind them of any important details about the exhibition, such as closing dates, purchasing opportunities, or upcoming related events.
Your opening is essentially your first impression on the public and the industry. Make sure it’s a memorable and professional experience that reflects the quality and passion of your photographic work.
- Guestbook:
Having a guest book at your photo exhibition is a valuable tool for a variety of purposes. Below is a detailed guide on how and why you should include a guest book at your exhibition:
- Direct Feedback: A guestbook allows visitors to leave comments about your exhibition. These comments can give you direct insight into what viewers think of your work, which can help you grow and improve as an artist.
- Networking: Visitors can provide their contact information, such as an email address or phone number. This gives you the opportunity to build a contact list for future exhibitions or projects.
- Book Design: Choose a book that reflects the style and aesthetic of your exhibition. It should be durable enough to withstand multiple entries and frequent handling.
- Location: Place the guestbook in an easily accessible spot, preferably near the exit. This encourages visitors to sign it and leave comments after they have viewed the entire exhibition.
- Clear Instructions: Consider adding a brief note at the beginning of the book encouraging visitors to leave comments and contact information. Make sure they know that their information will be used respectfully and only for purposes related to your art.
- Privacy: If you collect contact information, be sure to comply with applicable privacy regulations and laws. Do not share or use this information without the individuals' explicit consent.
- Regular Review: Set aside time after each day of posting to review the comments. This will not only provide you with immediate feedback, but it will also allow you to identify and address any negative or inappropriate comments.
- Post-Exhibition Engagement: Use the data you’ve collected to send thank-you notes, updates about upcoming exhibitions, or even special offers to those who expressed interest in purchasing your work.
- Digitization: Consider using a digital version of the guestbook, such as a tablet, where visitors can enter their comments and contact information. This can make it easier to organize and store the information.
- Remember: Over the course of your career, a guestbook can become a treasure trove of memories, reminding you of your first steps, people’s reactions, and the growth of your fan base.
In short, a guestbook is more than just a notebook for visitors to sign their names in. It’s a powerful tool for gathering feedback, building connections, and promoting your work, and it can serve as a priceless memento of your journey as an artist.
12 Documentation:
Documenting your photography exhibition is crucial for various aspects of your professional career and personal development as an artist. Here, I’ll explain the importance of documenting your exhibition properly and the methods for doing so:
- Professional Record: This documentation provides you with a tangible record of your exhibition, which can be useful for your portfolio, resume, and other professional presentations. These visual records demonstrate your ability to organize and present a comprehensive exhibition.
- Future Promotion: Images and videos from your exhibition may be used in promotional materials, such as brochures, websites, social media, and proposals for future exhibitions.
- Review and Reflection: Documentation allows you to review the layout and presentation of your exhibition, which can provide insights into how to improve or change certain aspects in future exhibitions.
- Photography Tips: It is essential that the photos you take of the exhibition are of high quality. Consider hiring a professional photographer, or, if you have photography skills, make sure to use a good camera and pay attention to the lighting.
- Variety of Angles: Capture images from different angles and perspectives. This includes wide shots of the space, close-ups of individual photographs, and shots of people interacting with the artwork.
- Video Documentation: A video can capture the energy and atmosphere of the exhibition, especially during events such as the opening. It can include interviews, visitor reactions, and a visual tour of the space.
- Testimonials and Interviews: Consider recording testimonials or interviews with visitors, other artists, or experts in the field. These can offer valuable insights into your work and the exhibition as a whole.
- Filed: Make sure you have both digital and physical copies of all documentation. This will protect you against accidental loss and ensure that you have access to this material in the future.
- Image Rights: If you decide to post images or videos featuring people, make sure you have the necessary permissions, especially if the people are clearly identifiable.
- Visual Narrative: Documentation is not merely a record; it can also tell a story. Organize the images and videos in a way that presents a coherent and engaging narrative of the exhibition, from its conception to its conclusion.
In conclusion, documenting your work serves not only as a record of your work but also as a valuable tool for promotion, learning, and professional growth. Investing time and resources in high-quality documentation can benefit you at many stages of your career as a photographer.
- Disassembly:
Taking down your photo exhibition is a crucial step that, although often overlooked, is essential to ensuring the integrity and safety of your works. Here are some things to consider and steps to follow during the takedown process:
- Planning: Before your exhibition ends, plan the date and time of the takedown in advance. This will allow you to coordinate with the exhibition venue and arrange for any assistance you may need.
- Tools and Materials: Make sure you have all the necessary tools on hand, such as hammers, ladders, gloves, and so on. Also consider protective materials like bubble wrap, cardboard, or fabric to wrap your artwork.
- Handle with Care: Photographs, especially if they are framed, can be fragile. Handle each piece with care to avoid damaging the images or frames.
- Disassembly Order: Consider the order in which you will disassemble the parts. You may want to start with the largest components or those that require the most time or effort to disassemble.
- Labeling: If you plan to transport the artwork to another location or store it, label each piece with details such as the title, date, and any other relevant information. This will make it easier to identify and organize the pieces later.
- Transportation: If the artwork is to be moved to another location, make sure you have appropriate transportation. The artwork must be transported in an upright position and never stacked on top of one another. Consider vehicles with sufficient space and climate-controlled conditions if necessary.
- Storage: If you do not plan to display your photographs elsewhere right away, consider the storage conditions. The works should be stored in a dry, dust-free place away from direct sunlight.
- Final Check: Before leaving the exhibition space, do a final check to make sure you haven’t left anything behind. This includes tools, materials, and, of course, none of your artwork.
- Acknowledgments: Take advantage of the dismantling process to personally thank the exhibition space staff for their support and cooperation during the exhibition period.
- Feedback from the Venue: Ask the venue or gallery staff if they have any comments or feedback about the exhibition. This information can be invaluable for future exhibitions.
Although dismantling may seem like a simple task, it is a critical phase that requires the same attention to detail as any other aspect of the exhibition. Ensuring that your artworks are safe and well cared for during this process will guarantee their longevity and preservation for future exhibitions or sales.
- Acknowledgments:
Recognizing and thanking those who have supported you in your photo exhibition is an essential and noble practice that strengthens relationships and builds bridges for future collaborations. Here is a detailed guide on how to approach your acknowledgments:
- List of Contributors: Make a list of all the people and organizations that have played a role in your exhibition. This may include gallery staff, sponsors, colleagues who helped with logistics, friends and family who offered moral support, and anyone else who contributed in any way.
- Personalization: A personalized thank-you note has a much greater impact than a generic message. Take the time to write a message that reflects the specific contribution of each person or organization.
- Ways to Express Gratitude: There are various ways to express gratitude, and the choice will depend on the relationship and the nature of the collaboration:
- Handwritten letters or cards: They’re perfect for very personal thank-you notes and have a personal touch.
- Emails: Suitable for formal thank-you notes or for people with whom you have a more professional relationship.
- Social media: A post thanking contributors and sponsors can give them public recognition.
- Acknowledgments in publications: If you produce a catalog or brochure for your exhibition, be sure to include an acknowledgments section.
- Thank-You Events: Consider organizing a small event or gathering after the exhibition to personally thank your closest collaborators. It could be a dinner, a toast, or simply an informal get-together.
- Thank-You Gifts: Depending on your budget and the nature of the collaboration, you may want to consider giving small gifts as a token of appreciation. This could be a print of one of your photographs, a book related to the exhibition’s theme, or any other small gift you deem appropriate.
- Positive Feedback: If the exhibition space or a service provider did an exceptional job, consider leaving them a positive review on their online platforms or recommending them to colleagues. This can be invaluable to them.
- Ongoing Gratitude: Don’t underestimate the power of expressing gratitude over time. A thank-you note sent months or even years later, acknowledging the collaboration and reiterating your gratitude, can strengthen the relationship.
- Acknowledgments for Future Exhibitions: If you plan to hold more exhibitions in the future, be sure to acknowledge those who supported you at previous events. This is not only a way to show your appreciation, but it also demonstrates that you value their long-term support.
Expressing gratitude is a way of acknowledging the effort and dedication of those who have supported you. It is not just a matter of courtesy, but a demonstration of empathy and appreciation that can have a significant impact on your professional and personal relationships.
- Definition of Theme or Concept: Clearly define the theme or concept of your exhibition. What is the main idea you want to convey through your photographs? Is there a recurring theme that ties all the images together?
- Selecting Photographs: Carefully choose the images that best represent your theme and demonstrate the highest technical and artistic quality.
- Choosing Paper and Finish: The choice of paper is essential. The texture (smooth or textured) and finish (gloss, matte, luster, pearl, baryta, or satin) can influence how the details and colors in the image are perceived. Each type of paper can add a different narrative dimension to your photographs.
Ink Types: Choosing the right ink is essential to ensuring that colors and black tones are reproduced accurately and true to the original intent. Researching and testing different types of ink can help you achieve the perfect reproduction of your images.
- Presentation Format: Decide on the format in which you will present your work—whether framed, mounted on foam board, or printed on canvas. Consider the size and whether you will include a description or text alongside each photo.
- Exhibition Space: Find a suitable venue to display your work, such as an art gallery, a café, or a library. Consider factors such as size, lighting, and accessibility.
- Budget: Determine a budget that covers all expenses, from printing and framing the photographs to promoting the exhibition.
- Promotion: Once everything is ready, promote your exhibition through social media, local media, invitations, and events.
- Opening: Organize an opening event to formally present your work to friends, family, colleagues, and industry professionals.
- Selling Photographs: If you decide to sell your work, set appropriate prices and consider offering different formats or sizes.
- Guest Book: Provides a space where attendees can share their thoughts and contact information.
- Documentation: Document the entire process—from installation to audience interaction with your works—for future reference and promotional purposes.
- Dismantling: Plan how and when you will take down the exhibition, ensuring that your photographs remain intact.
- Acknowledgments: Please acknowledge and thank everyone who supported you in the process of creating and setting up the exhibition.
Definition of Topic or Concept:
The theme or concept of your photo exhibition is the cornerstone upon which the entire show is built. It is the central idea you want to convey to your viewers and the common thread that ties each of your photographs together. Here are some things to keep in mind:
- Authenticity: Choose a subject you're passionate about and feel connected to. Your sincerity and commitment to the subject will shine through in your work and resonate with your audience.
- Research: Once you’ve chosen a topic, do some research on it. This will give you a deeper understanding and allow you to approach it from different angles. For example, if you choose “urban landscapes,” research the city’s history, architectural changes over the years, and the stories of its residents.
- Coherence: Make sure all the photographs selected for the exhibition relate to the chosen theme. It doesn't have to be a direct connection, but there should be a common thread linking them.
- Narrative: Think about how you want the audience to experience your exhibition. Is there a story you want to tell? If so, arrange your photographs in a way that guides the viewer through that narrative.
- Originality: Although many subjects have been explored time and again in photography, there is always room for a new and fresh approach. Think about how you can approach your subject from a unique perspective.
- Relevance: While not mandatory, consider how relevant your topic is in today’s context. A topic that resonates with current events or situations can attract a wider audience and spark meaningful discussions.
In short, defining your topic or concept is a crucial decision that will lay the groundwork for the success of your presentation. It’s an opportunity to share your worldview, your passions, and your reflections with others, so take the time to choose it carefully and develop it thoughtfully.
- Selection of Photographs:
Selecting photographs for your exhibition is a crucial process that will determine how your work is perceived. It’s an opportunity to showcase your technical and artistic skills and to convey your vision to the public. Here are some key points to consider:
- Technical Quality: Make sure the photos you select are of high quality in terms of focus, exposure, composition, and post-processing. Any technical flaws can distract the viewer from the message or emotion you’re trying to convey.
- Thematic Relevance: All selected images must align with the theme or concept of your exhibition. While it may be tempting to include a spectacular photo that isn’t directly related to the theme, this can confuse or disorient the audience.
- Diversity and Variety: While it is essential to stay true to the theme, it is also beneficial to showcase different facets or perspectives of it. This can help keep the viewer engaged and provide a deeper understanding of the concept you are presenting.
- Flow and Sequence: Consider the order in which the photographs will be displayed. Is there a narrative or logical progression you want to follow? The way you organize the images can influence the viewer’s experience and how they interpret your work.
- Emotional Impact: Think about the emotions you want to evoke in your audience. Some photographs can be powerful and thought-provoking, while others can be subtle and contemplative. Striking the right balance can create an enriching experience for the viewer.
- Space Constraints: Consider the space where the exhibition will take place. How many photographs can you comfortably display without making the space feel crowded? Sometimes less is more, and selecting only your best work can have a more significant impact.
- Feedback and Opinions: Before making a final decision, it can be helpful to seek the opinions of colleagues, mentors, or friends. Often, an outside perspective can offer valuable insights or highlight aspects you may not have considered.
In short, selecting photographs is a process that requires careful thought and attention. Each image should be a true representation of your vision and skills, and together, they should tell a cohesive and captivating story. It is essential to be critical and selective to ensure that your exhibition has the desired impact.
- Choosing Paper and Finish:
Choosing the right paper and finish for your photo prints can be just as important as your shooting technique or post-processing. Below is a detailed guide on how to approach selecting the paper and finish for your prints:
Understanding the Role
- Weight: The paper weight, measured in grams per square meter (g/m²), indicates the paper's thickness and stiffness. Heavier paper is generally more durable and sturdy, but it can also be more expensive.
- Ink absorption: Some papers absorb more ink than others. This can affect the sharpness and saturation of the image. It is important to choose paper that is specifically designed for photo printing.
Paper Textures
- Smooth: Ideal for photographs with fine details, such as portraits. It provides a uniform surface that allows for a clear reproduction of the image.
- Textured: This can add a tactile quality to the photo, making it appear more three-dimensional. It’s excellent for artistic works or photos that aim for a more traditional look.
Types of Finish
- Brightness: It enhances contrast and color vibrancy, but it can cause glare, which might make it difficult to see the screen from certain angles.
- Matte: Reduces glare and is ideal for images with soft tones. However, it may not be the best choice for photos with vibrant colors.
- Satin: A combination of gloss and matte, providing a balance in terms of color and sheen.
- Pearlescent: It has a shimmering finish with a metallic effect, ideal for vibrant, modern images.
- Baryta: Mimics the look of traditional darkroom prints. Ideal for black-and-white photographs.
- Satin: Provides a smooth finish with a subtle sheen, preserving details while preventing excessive glare.
Narrative Considerations:
- The paper and finish can add a narrative dimension to your images. For example, an old or historical photo might benefit from a baryta finish to evoke a sense of nostalgia, while a photo of an urban nightscape could look spectacular on a pearlescent finish.
- Testing: If possible, print test samples on different types of paper and with different finishes. See how the image looks on each and decide which one best matches your vision.
- Consult with Professionals: If you're unsure, consult with professionals at photo labs. Their expertise can provide valuable insights into which paper and finish would be best for your photos.
Choosing the right paper and finish not only enhances the beauty and professionalism of your images, but also conveys your artistic vision and narrative. It is a powerful tool in the photographer’s hands for conveying feelings, emotions, and stories through photography.
Ink Types
The choice of ink in photographic and fine art printing is essential to ensuring an accurate and long-lasting reproduction of images. Below, we detail the importance of water-based pigment inks and provide a brief overview of other available options:
Water-Based Pigment Inks
- Water-based pigment inks lead the market in terms of color and tone reproduction. They offer a wide and rich color range, capturing nuances and gradations that other inks cannot achieve.
- They are known for their resistance to fading and durability, making them ideal for archival prints and gallery exhibitions.
- They stand out for their ability to produce deep blacks, enhancing contrast and image clarity.
Dye-Based Inks
- These inks are water-soluble and produce bright, vibrant colors. However, their resistance to fading may be lower compared to pigment-based inks.
Solvent-based inks:
- They are ideal for outdoor use because they are water- and UV-resistant. Although they offer vibrant colors, they may not reproduce subtle shades as accurately.
UV inks:
- These inks cure under ultraviolet light and are fade-resistant. They are ideal for outdoor signage and advertising, but may not be the best choice for high-quality art reproduction.
Latex Inks
- They are eco-friendly and offer good resistance to water and fading. They are mainly used in large-format applications.
While water-based pigment inks are the undisputed choice for professional photographic and fine art printing due to their precision and longevity, it is essential to recognize the applications and advantages of the other inks available on the market. Each type has its own benefits and limitations, so it is crucial to research and test them based on the specific needs of the project.
In short, choosing the right ink is a critical aspect of photographic and fine art printing. Water-based pigment inks excel in terms of quality and durability, but it is essential to consider all options based on the specific requirements and specifications of the project at hand.
- Presentation Format
Presenting your photos in the right way can enhance their impact and convey professionalism. Here are some key points to consider:
Framed
- Frame Material: Options range from wood, metal, and plastic to eco-friendly materials. Your choice should complement the style of your photos.
- Color and Style: Dark frames can provide a striking contrast to bright photos, while light frames can soften more intense images.
- Glass or Acrylic: Ideal for protecting the photo from dust and external factors. Anti-glare glass is an option for minimizing reflections.
Mounting on a rigid surface
- Foam Mounting: Offers a clean, contemporary look. Its lightweight nature makes it ideal for temporary exhibitions.
- Mounting on Aluminum Dibond: A durable and elegant option that gives photos a modern, smooth finish. Aluminum Dibond consists of two aluminum sheets with a polyethylene core, providing both stability and lightness. It is resistant to warping and perfect for large-format photographs.
Canvas Print
- Canvas adds an artistic, textured touch to photographs. It is particularly effective for portraits and landscapes.
Other considerations
- Print Size: You should adjust the size to fit the available space and achieve the desired effect. Both a single large image and several small ones can make a significant impact.
- Descriptions or Captions: Adding descriptive captions can provide context for each photo. The text should be consistent with the style of the exhibition.
- Interactivity: Consider digital elements, such as QR codes, that can enhance the visitor experience with multimedia content.
- Order and Layout: The arrangement of the photos can guide a visual narrative. Plan how you want the audience to experience your work.
- Protection: If your artwork is particularly valuable or delicate, consider lamination or UV coating.
- Additional Copies: If you plan to sell your work, having copies in different sizes or formats can be advantageous.
The presentation format is an expression of your creativity and vision as a photographer. Make sure that every choice reinforces the essence of your work and helps you connect with your audience.
- Exhibition Space
The space where you choose to exhibit your work is crucial to how the public perceives and experiences it. Here are some additional considerations for choosing and preparing the exhibition space:
- Location: The location of the space is crucial. A central or well-known location can attract more visitors. However, a more secluded space with a special atmosphere can also offer a unique experience.
- Acoustics and Ambience: If you plan to have music or any kind of audio presentation, the venue’s acoustics are essential. In addition, temperature and ventilation are factors that can affect visitors’ comfort.
- Lighting: Lighting can make or break a photo shoot. Make sure the space allows you to adjust the lighting to suit your needs, whether using natural or artificial light.
- Walls and Installation: Consider the color and texture of the walls. A neutral color like white or light gray is usually ideal for showcasing photographs. Also, check whether the space allows for nailing or gluing to the walls, or if you’ll need additional mounting hardware to hang your artwork.
- Security: If your photographs have significant value—whether emotional or monetary—consider the security of the location. This may include security cameras, security personnel, or alarm systems.
- Accessibility: Make sure the space is accessible to everyone, including people with disabilities. This may involve ramps, elevators, or proper signage.
- Additional Amenities: Depending on the length of your exhibition, you may need amenities such as restrooms, a lounge area, or even a small café or bar.
- Contract and Agreement: Before confirming the space, read any contract or agreement carefully. Make sure you understand the obligations, rights, and responsibilities of both parties.
- Preliminary Visit: If possible, visit the space several times at different times of the day. This will give you an idea of the natural lighting and foot traffic in the area.
- Feedback: Before the exhibition, consider inviting a small group of friends or colleagues to get their feedback on the installation and presentation in the chosen venue.
By giving the exhibition space the attention it deserves, you not only ensure that your work is presented in the best possible light, but you also provide a memorable experience for your visitors.
- Budget:
A budget is an essential tool for ensuring that your photo exhibition is not only an artistic success but also a financial one.
- Initial Estimate: Before you start spending any money, it’s important to have a general idea of how much you’re willing to invest in your exhibition. This amount should be realistic and based on your savings, expected income, or potential sponsors.
- Fixed Costs: These are the costs you will have to pay regardless of how many people attend your exhibition.
- Photo Printing: Research different providers and print quality options. Remember that high-quality printing can make a big difference in how your work is perceived.
- Framing: Depending on the display format you choose, framing can be a significant expense. Look for options that protect your photos while also complementing your work.
- Rental Fees: While some venues may offer you their space for free or in exchange for a percentage of sales, others may require a rental fee.
- Variable Costs: These costs depend on the number of attendees or other factors.
- Advertising: If you decide to invest in paid advertising, such as ads on social media or in local media, this would be a variable cost.
- Catering for the Opening Event: If you decide to serve refreshments or drinks during the opening, be sure to factor this expense into your budget.
- Expected Income: If you plan to sell your photographs, estimate how much you expect to earn. This will help you set your prices and determine whether you’ll cover your costs and make a profit.
- Contingency Fund: It’s always a good idea to set aside a small amount of money for unexpected expenses or emergencies. This could be an additional 10% of your total estimated budget.
- Recording and Tracking: As you plan your exhibition, keep a detailed record of all your expenses. This will help you stay within your budget and make adjustments if necessary.
With a well-planned and closely monitored budget, you'll reduce financial stress and be able to focus on what matters most: presenting your work in the best possible way.
8. Promotion:
Promotion is essential to ensuring that your photo exhibition attracts as many visitors as possible and receives the recognition it deserves. Here is a more detailed breakdown of this point:
- Identifying Your Target Audience: Before launching any promotional strategy, it is crucial to identify who your exhibition is aimed at. Is it intended for the general public, photography enthusiasts, industry professionals, or art collectors? Understanding your audience will allow you to tailor your messages and communication channels.
Social Media:
- Regular Posts: Share updates, behind-the-scenes photos, the setup process, and other aspects related to the exhibition. This builds anticipation and fosters a connection with your audience.
- Paid Ads: Platforms like Facebook and Instagram offer targeted advertising options that can help you reach a wider and more specific audience.
- Stories and Live Streams: Use these formats to interact with your followers in real time, offer virtual tours, or host Q&A sessions about your work.
Local Media:
- Press Releases: Write a clear and concise press release about your exhibition and send it to local media outlets: newspapers, radio stations, and television stations.
- Interviews: If you have the opportunity, take part in interviews to discuss your exhibition and your work in general.
- Partnerships: Consider partnering with influencers, bloggers, or content creators involved in the local art or culture scene. They can help you promote your exhibition in exchange for exclusive access or special content.
- Invitations: Send physical or digital invitations to key contacts, such as art critics, industry professionals, friends, and family. Make sure the information is clear and appealing.
- Related Events: Organize talks, workshops, or discussions related to your exhibition. This can attract a diverse audience and generate more interest in your work.
- Signage and Posters: Make sure you have adequate signage at the exhibition venue and consider placing posters in strategic locations around the city.
Feedback and Adaptation: Monitor the effectiveness of your promotional strategies and don’t hesitate to adjust them based on audience responses and feedback.
Remember that promotion isn't just about attracting as many people as possible, but about attracting the right audience and creating a memorable experience around your work. Anticipation and planning are key to a successful promotion.
9. Opening:
The opening is the event that marks the official start of your photography exhibition. It’s an opportunity to showcase your work, interact with the public, and network with professionals and enthusiasts in the field. Here’s a more detailed breakdown of this point:
- Date and Time: Choose a date and time that works for most of your guests. Try to avoid holidays or dates when other major events are taking place in your city. Openings are usually held in the afternoon or evening to allow people to attend after work.
- Special Invitations: In addition to general invitations, consider sending personalized invitations to key individuals, such as art critics, curators, collectors, and other professionals in the field.
- Welcome Protocol: Designate a specific area for greeting guests. It may be helpful to have someone at the entrance to welcome guests, hand out a program or exhibition brochure, and direct attendees.
- Opening Remarks: Be prepared to give a brief speech about your work, the concept behind the exhibition, and to thank those who have supported you. This not only sets a formal and professional tone, but also provides context for the audience.
- Catering: Depending on your budget, you can offer appetizers, drinks, or even a full catering service. Be sure to offer options for different dietary preferences and consider including non-alcoholic options.
- Music: Music can set the right mood for your opening. Choose instrumental or soft music that won’t distract from the visual experience. If your budget allows, you might consider hiring a live musician or small ensemble.
- Interaction: Take the time to interact with your guests. Answer questions about your work, gather feedback, and build connections. Remember that the opening isn’t just about your work—it’s also about building relationships.
- Documentation: Make sure to have someone document the event, whether through photos or video. This documentation is valuable for your portfolio and future promotional efforts.
- Acknowledgments: At the end of the opening, take a moment to thank the attendees for coming and those who helped you organize the event.
- Reminders: Before your guests leave, remind them of any important details about the exhibition, such as closing dates, purchasing opportunities, or upcoming related events.
Your opening is essentially your first impression on the public and the industry. Make sure it’s a memorable and professional experience that reflects the quality and passion of your photographic work.
- Guestbook:
Having a guest book at your photo exhibition is a valuable tool for a variety of purposes. Below is a detailed guide on how and why you should include a guest book at your exhibition:
- Direct Feedback: A guestbook allows visitors to leave comments about your exhibition. These comments can give you direct insight into what viewers think of your work, which can help you grow and improve as an artist.
- Networking: Visitors can provide their contact information, such as an email address or phone number. This gives you the opportunity to build a contact list for future exhibitions or projects.
- Book Design: Choose a book that reflects the style and aesthetic of your exhibition. It should be durable enough to withstand multiple entries and frequent handling.
- Location: Place the guestbook in an easily accessible spot, preferably near the exit. This encourages visitors to sign it and leave comments after they have viewed the entire exhibition.
- Clear Instructions: Consider adding a brief note at the beginning of the book encouraging visitors to leave comments and contact information. Make sure they know that their information will be used respectfully and only for purposes related to your art.
- Privacy: If you collect contact information, be sure to comply with applicable privacy regulations and laws. Do not share or use this information without the individuals' explicit consent.
- Regular Review: Set aside time after each day of posting to review the comments. This will not only provide you with immediate feedback, but it will also allow you to identify and address any negative or inappropriate comments.
- Post-Exhibition Engagement: Use the data you’ve collected to send thank-you notes, updates about upcoming exhibitions, or even special offers to those who expressed interest in purchasing your work.
- Digitization: Consider using a digital version of the guestbook, such as a tablet, where visitors can enter their comments and contact information. This can make it easier to organize and store the information.
- Remember: Over the course of your career, a guestbook can become a treasure trove of memories, reminding you of your first steps, people’s reactions, and the growth of your fan base.
In short, a guestbook is more than just a notebook for visitors to sign their names in. It’s a powerful tool for gathering feedback, building connections, and promoting your work, and it can serve as a priceless memento of your journey as an artist.
12 Documentation:
Documenting your photography exhibition is crucial for various aspects of your professional career and personal development as an artist. Here, I’ll explain the importance of documenting your exhibition properly and the methods for doing so:
- Professional Record: This documentation provides you with a tangible record of your exhibition, which can be useful for your portfolio, resume, and other professional presentations. These visual records demonstrate your ability to organize and present a comprehensive exhibition.
- Future Promotion: Images and videos from your exhibition may be used in promotional materials, such as brochures, websites, social media, and proposals for future exhibitions.
- Review and Reflection: Documentation allows you to review the layout and presentation of your exhibition, which can provide insights into how to improve or change certain aspects in future exhibitions.
- Photography Tips: It is essential that the photos you take of the exhibition are of high quality. Consider hiring a professional photographer, or, if you have photography skills, make sure to use a good camera and pay attention to the lighting.
- Variety of Angles: Capture images from different angles and perspectives. This includes wide shots of the space, close-ups of individual photographs, and shots of people interacting with the artwork.
- Video Documentation: A video can capture the energy and atmosphere of the exhibition, especially during events such as the opening. It can include interviews, visitor reactions, and a visual tour of the space.
- Testimonials and Interviews: Consider recording testimonials or interviews with visitors, other artists, or experts in the field. These can offer valuable insights into your work and the exhibition as a whole.
- Filed: Make sure you have both digital and physical copies of all documentation. This will protect you against accidental loss and ensure that you have access to this material in the future.
- Image Rights: If you decide to post images or videos featuring people, make sure you have the necessary permissions, especially if the people are clearly identifiable.
- Visual Narrative: Documentation is not merely a record; it can also tell a story. Organize the images and videos in a way that presents a coherent and engaging narrative of the exhibition, from its conception to its conclusion.
In conclusion, documenting your work serves not only as a record of your work but also as a valuable tool for promotion, learning, and professional growth. Investing time and resources in high-quality documentation can benefit you at many stages of your career as a photographer.
- Disassembly:
Taking down your photo exhibition is a crucial step that, although often overlooked, is essential to ensuring the integrity and safety of your works. Here are some things to consider and steps to follow during the takedown process:
- Planning: Before your exhibition ends, plan the date and time of the takedown in advance. This will allow you to coordinate with the exhibition venue and arrange for any assistance you may need.
- Tools and Materials: Make sure you have all the necessary tools on hand, such as hammers, ladders, gloves, and so on. Also consider protective materials like bubble wrap, cardboard, or fabric to wrap your artwork.
- Handle with Care: Photographs, especially if they are framed, can be fragile. Handle each piece with care to avoid damaging the images or frames.
- Disassembly Order: Consider the order in which you will disassemble the parts. You may want to start with the largest components or those that require the most time or effort to disassemble.
- Labeling: If you plan to transport the artwork to another location or store it, label each piece with details such as the title, date, and any other relevant information. This will make it easier to identify and organize the pieces later.
- Transportation: If the artwork is to be moved to another location, make sure you have appropriate transportation. The artwork must be transported in an upright position and never stacked on top of one another. Consider vehicles with sufficient space and climate-controlled conditions if necessary.
- Storage: If you do not plan to display your photographs elsewhere right away, consider the storage conditions. The works should be stored in a dry, dust-free place away from direct sunlight.
- Final Check: Before leaving the exhibition space, do a final check to make sure you haven’t left anything behind. This includes tools, materials, and, of course, none of your artwork.
- Acknowledgments: Take advantage of the dismantling process to personally thank the exhibition space staff for their support and cooperation during the exhibition period.
- Feedback from the Venue: Ask the venue or gallery staff if they have any comments or feedback about the exhibition. This information can be invaluable for future exhibitions.
Although dismantling may seem like a simple task, it is a critical phase that requires the same attention to detail as any other aspect of the exhibition. Ensuring that your artworks are safe and well cared for during this process will guarantee their longevity and preservation for future exhibitions or sales.
- Acknowledgments:
Recognizing and thanking those who have supported you in your photo exhibition is an essential and noble practice that strengthens relationships and builds bridges for future collaborations. Here is a detailed guide on how to approach your acknowledgments:
- List of Contributors: Make a list of all the people and organizations that have played a role in your exhibition. This may include gallery staff, sponsors, colleagues who helped with logistics, friends and family who offered moral support, and anyone else who contributed in any way.
- Personalization: A personalized thank-you note has a much greater impact than a generic message. Take the time to write a message that reflects the specific contribution of each person or organization.
- Ways to Express Gratitude: There are various ways to express gratitude, and the choice will depend on the relationship and the nature of the collaboration:
- Handwritten letters or cards: They’re perfect for very personal thank-you notes and have a personal touch.
- Emails: Suitable for formal thank-you notes or for people with whom you have a more professional relationship.
- Social media: A post thanking contributors and sponsors can give them public recognition.
- Acknowledgments in publications: If you produce a catalog or brochure for your exhibition, be sure to include an acknowledgments section.
- Thank-You Events: Consider organizing a small event or gathering after the exhibition to personally thank your closest collaborators. It could be a dinner, a toast, or simply an informal get-together.
- Thank-You Gifts: Depending on your budget and the nature of the collaboration, you may want to consider giving small gifts as a token of appreciation. This could be a print of one of your photographs, a book related to the exhibition’s theme, or any other small gift you deem appropriate.
- Positive Feedback: If the exhibition space or a service provider did an exceptional job, consider leaving them a positive review on their online platforms or recommending them to colleagues. This can be invaluable to them.
- Ongoing Gratitude: Don’t underestimate the power of expressing gratitude over time. A thank-you note sent months or even years later, acknowledging the collaboration and reiterating your gratitude, can strengthen the relationship.
- Acknowledgments for Future Exhibitions: If you plan to hold more exhibitions in the future, be sure to acknowledge those who supported you at previous events. This is not only a way to show your appreciation, but it also demonstrates that you value their long-term support.
Expressing gratitude is a way of acknowledging the effort and dedication of those who have supported you. It is not just a matter of courtesy, but a demonstration of empathy and appreciation that can have a significant impact on your professional and personal relationships.


Recent comments